

How To Make An Image Bigger But Keep The Quality
A picture is worth a thousand words, but is it sending the right message? Not if it's warped, distorted, or jagged. Learn how to resize an image correctly for presentations, documents, and more.
That's a stretch
When you're working with images or screenshots in a document, there are often selectable arrows on the sides and corners. Convenient, right? You can just move the sides as much as you want, or expand the corners, to make it the right size.
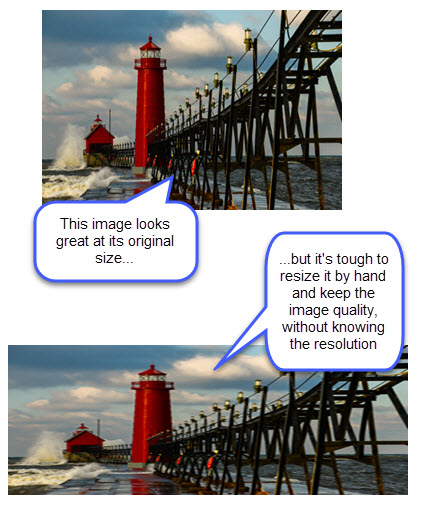
It's tempting, but not a good idea. Usually, this stretches the image out, making it look slightly blurry or pixelated. Sometimes you can get away with it if you hold down the Shift key to keep it proportional, and you're only making it smaller…but it's still sketchy. A better way is to resize your picture or screenshot in an image editing program, and then add it back to your document. It takes more steps, but it's worth it. You'll be able to control the image quality, which comes in handy when you want your finished product to look polished and professional.
Smaller is easier
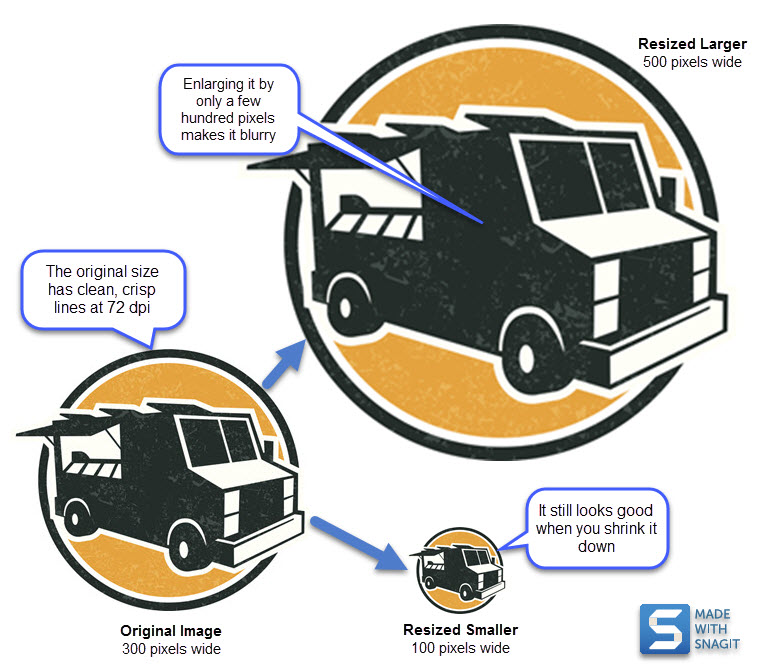
It's usually pretty safe to scale down an image. When you make it smaller, it typically still looks good. It has all the pixels (tiny dots of color) it needs, it's just being condensed.
You get into trouble when you make your image bigger. If you don't have enough pixels per inch, your enlarged image will look fuzzy or choppy. Check the resolution to see how much you can safely expand your image. Whereas 72 dpi doesn't give you much room to expand, 300 dpi does, especially if you ever want to print your image. If you plan to do more with images, you'll want to learn how pixels work and a rule of thumb when figuring out how big you can make your image.
Keep it in perspective
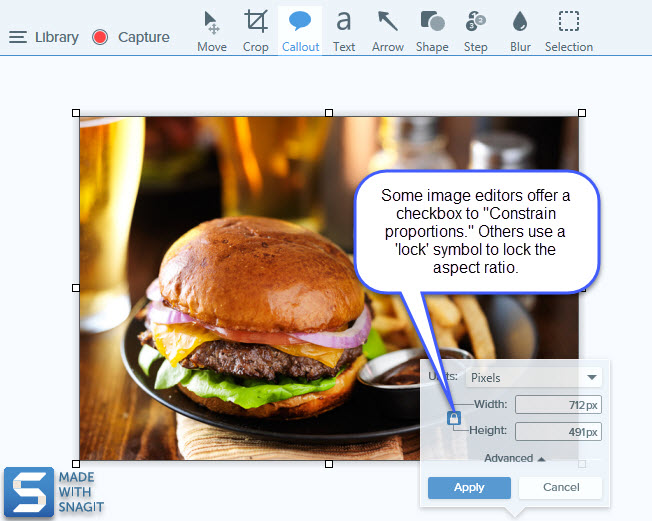
When you resize an image or screenshot, keep the same ratio of width to height. Most image editors have a "constrain proportions" checkbox that automatically does this for you, or you can usually hold down the Shift key while resizing. Keeping the same aspect ratio makes sure that your image doesn't look stretched or warped. If you're aiming for a particular width and a specific height, you may need to do a combination of cropping and resizing to get your image where you want it, and still keep it proportional.
Now that you have a few of the basics, you're ready to get going with making images and screenshots for your PowerPoints, reports, and social media look the best they can. We want to know your tips and tricks for resizing. Add them in the comments below!
Need an image editor? Snagit easily lets you resize, check proportions, and save in multiple file formats. Get your free trial today.
Subscribe to TechSmith's Newsletter
Join over 200,000 people who get actionable tips and expert advice every month in the TechSmith Newsletter.
SubscribeHow To Make An Image Bigger But Keep The Quality
Source: https://www.techsmith.com/blog/how-to-resize-an-image-correctly/
Posted by: johnwouser.blogspot.com
0 Response to "How To Make An Image Bigger But Keep The Quality"
Post a Comment